Go easy on me this is my first tutorial =)
This is to make the plastic distressed flowers that I feature on my LOs 'Relationships' and 'Young and Unprepared'. I came about making this flower just by experimenting. I was looking at an old cricut mat and thinking that I could make my own transparency from the cover and when I cut out the flower I thought how much cooler would it look if the melted the plastic and from there this flower was born.
Supplies Needed:
-Plastic transparency (I recycled an old cricut mat cover)
-Flower punch (2 sizes) or die cut machine (I used the gypsy wanderings cartridge for my flower shape)
-Distress Ink
-Lighter
-Brad
-Glimmer mist
Step 1:
Ink the flowers. Make sure that you have two different size flowers as you will layer one on top of the other.
Step 2:
Pierce a hole in the center of both flowers. Place the smaller flower on top of the larger one. Put the brad through the holes, but do not fasten the brad closed yet.
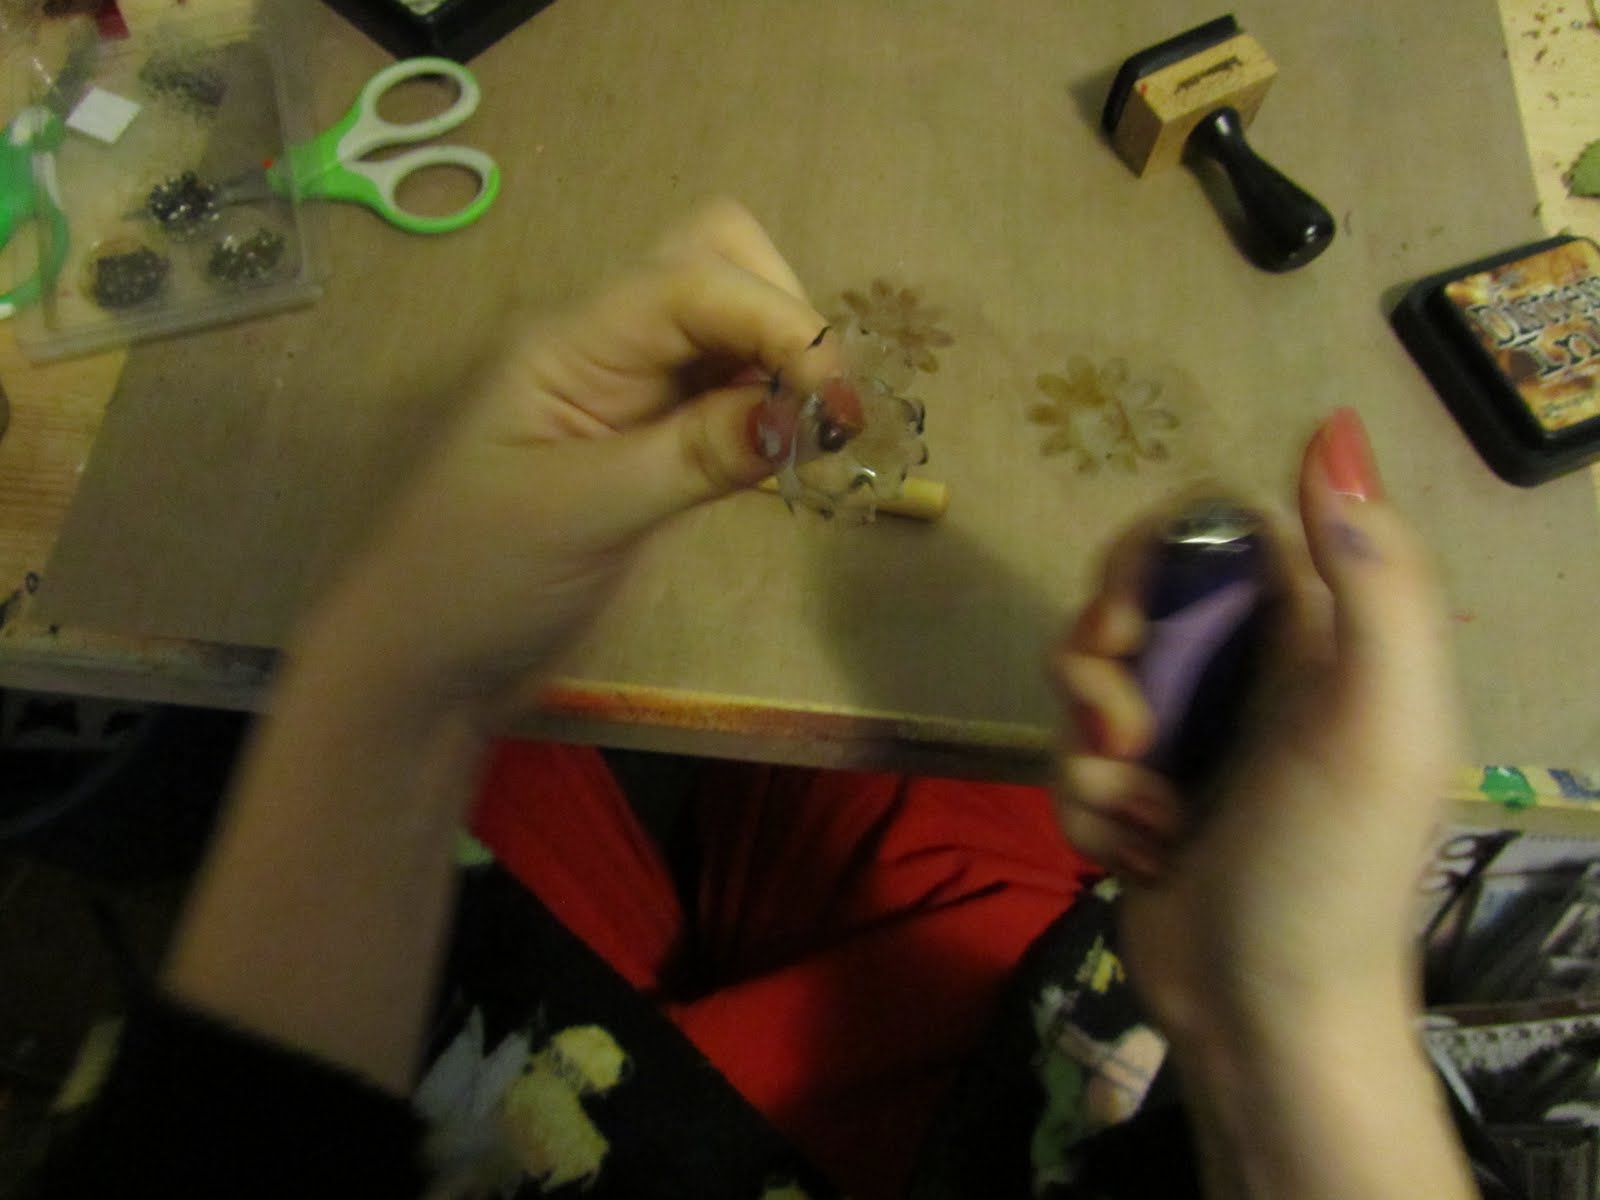
Step 3:
Hold the prongs of the brad, burn the edges of the bigger flower. If plastic catches fire just blow it out. Though letting it burn for a few seconds creates the black burn marks that makes it much cooler.
Step 4:
Hold the lighter underneath the smaller flower to make the plastic melt inward. Keep melting and burning the edges until you achieve the look you desire.
Step 5:
Spritz with glimmer mist. Let it dry completely.
Finished Product:
Well I hope you enjoyed this tutorial!!
-Ashley =)


Great tutorial Ashley! Thanks for sharing!
ReplyDeleteThis is a great tutorial! Thanks for sharing!
ReplyDeleteVery cool tut Ashley!!!!
ReplyDeleteOh sweet! You're so innovative! I will have to try this!
ReplyDeleteAWESOME tutorial! TFS girl!!!!
ReplyDeleteGreat job girl!! Fire lol!!!!
ReplyDeleteAwesome! Thanks for sharing this!
ReplyDeleteVery cool tut and neat idea!! Thanks for visiting and following my blog!!
ReplyDelete